# Creating New Invoice
Generate new invoices directly from your CRM to efficiently bill contacts for their purchases of your products and services. This seamless integration streamlines the billing process, allowing you to manage customer relationships and financial transactions with ease, ultimately enhancing your business operations.
### Creating New Invoice
To create a new invoice, simply click on the **+New** button and begin the process. You can also add global terms of service or notes by selecting the gear wheel icon located next to the + New button.
#### New Invoice Page
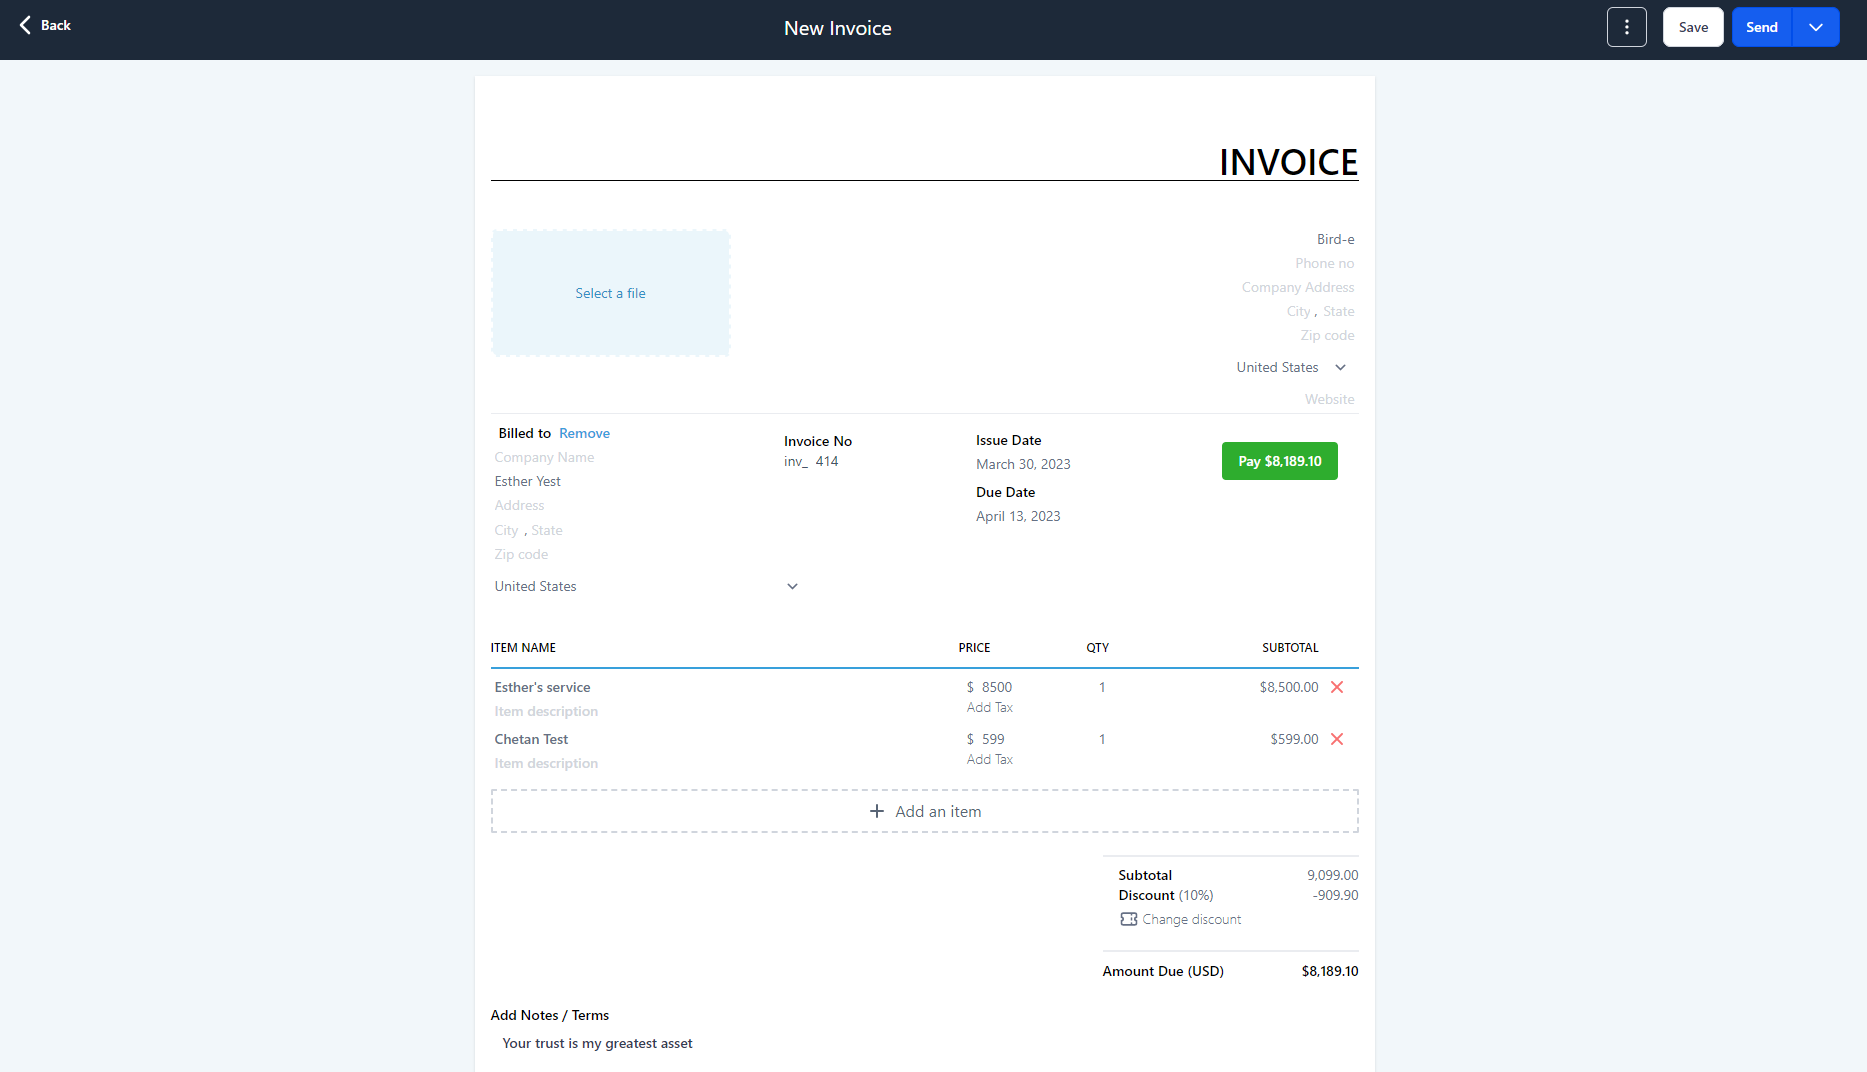
Upon clicking the New button, you'll be directed to the invoice editor page.
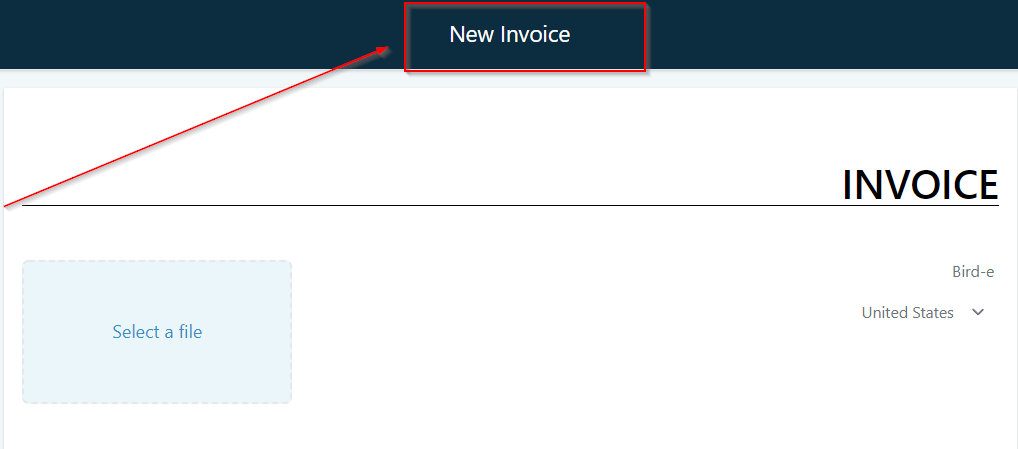
#### Naming an Invoice
This is where you can customize the name of your invoice, which will be visible in the invoice list. Assigning unique names to each invoice is particularly helpful when managing a long list of invoices in your system, as it allows for easy identification and organization.
#### **Adding Invoice Info**
Here are the Six (6) pieces of information you need to fill out in the invoice before sending them out:
1. **From Info** Edit the “from info” by just clicking on the text and it will allow you to edit that information.
2. **Image** You can upload your business logo from here. Clicking on this option will open the media library of your CRM. If you haven't uploaded your business logo image in your media library yet, you will first need to do it so you can access the image to paste it on your Invoice.
3. **Billed To** Then you can add the client by clicking on the box and you can edit the Invoice number, Issue, and Due dates.
* You can either select from your contacts or add new contacts. [Click here to learn more about adding a new contact to the invoice.](https://crmhelpcenter.gitbook.io/entrepreneur-club/payments/invoices/creating-new-invoice#add-new-client)
* Every time you create a new Invoice, the system generates a sequential number which is assigned to each invoice automatically. The invoice number can be edited provided the Invoice number you enter is either the next available number in the sequence or the number that was never utilized by the system.
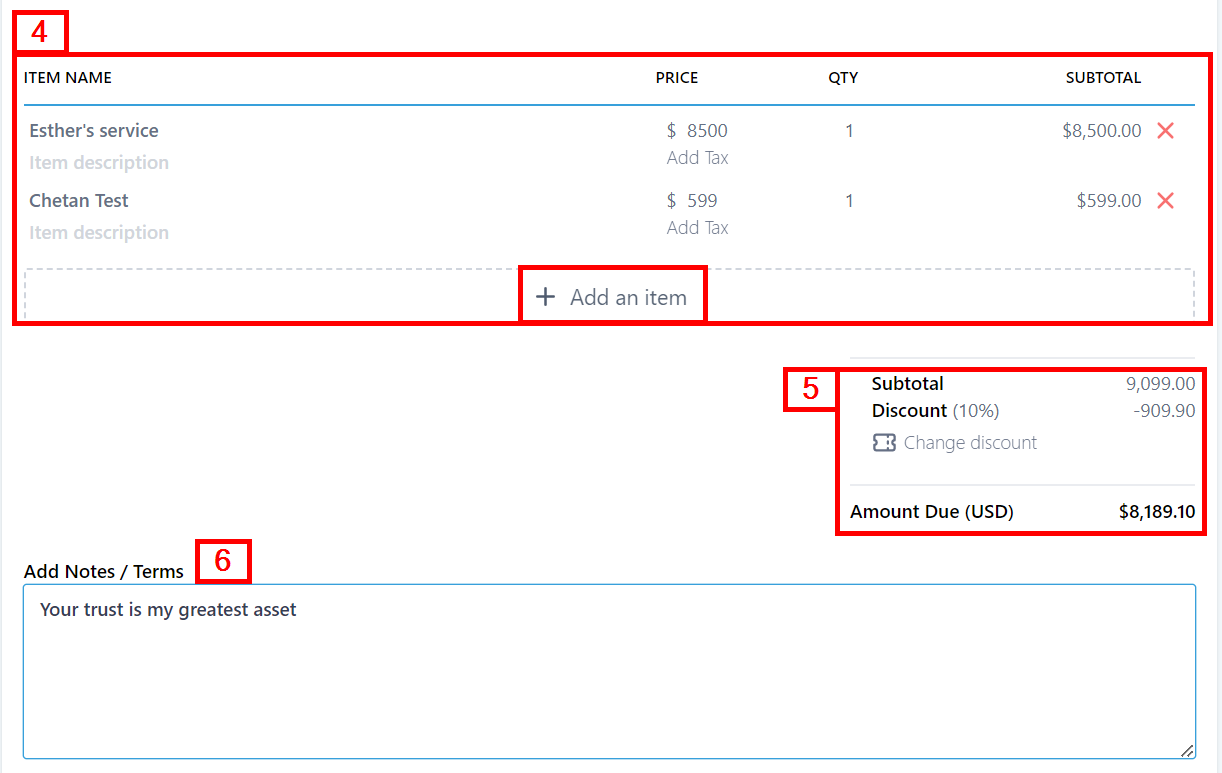
4. **Add an Item** Click "Add an Item" to add the products that you have created on your products tab.
* Once you add the product it will allow you to edit the price and quantity by clicking on them. If you need to know how to create products in your CRM, you can refer to the [Products](https://crmhelpcenter.gitbook.io/entrepreneur-club/payments/products) in Payments.
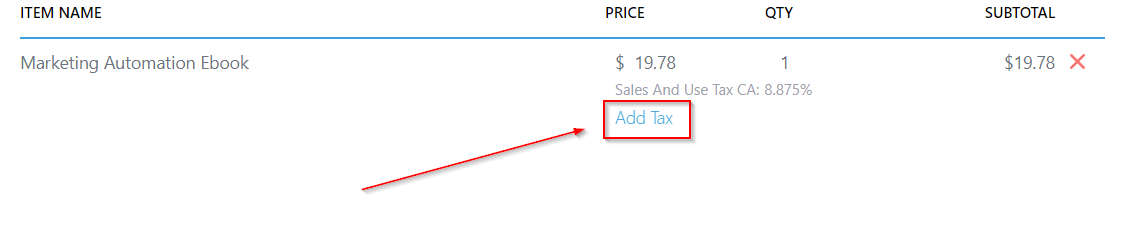
* This allows you to add taxes for your products or services. Your clients can see the breakup of the total amount they are paying and the tax amount included in the final price. [Click here to learn more about adding Tax to the invoice.](https://crmhelpcenter.gitbook.io/entrepreneur-club/payments/invoices/creating-new-invoice#add-tax)
* It also shows the Subtotal for each of the items selected.
5. **Subtotal** The subtotal sum up the total amount from the items selected.
* You can also add any discount you want here and the "Amount Due" shows the Final price you will be getting from your client. [Click here to learn more about adding discounts to the invoice.](https://crmhelpcenter.gitbook.io/entrepreneur-club/payments/invoices/creating-new-invoice#add-discount)
6. **Add Note/Terms** Your preset Notes/Terms will appear here. You can edit this based on your specific goals for an individual invoice.
### Invoice options
#### **Preview**
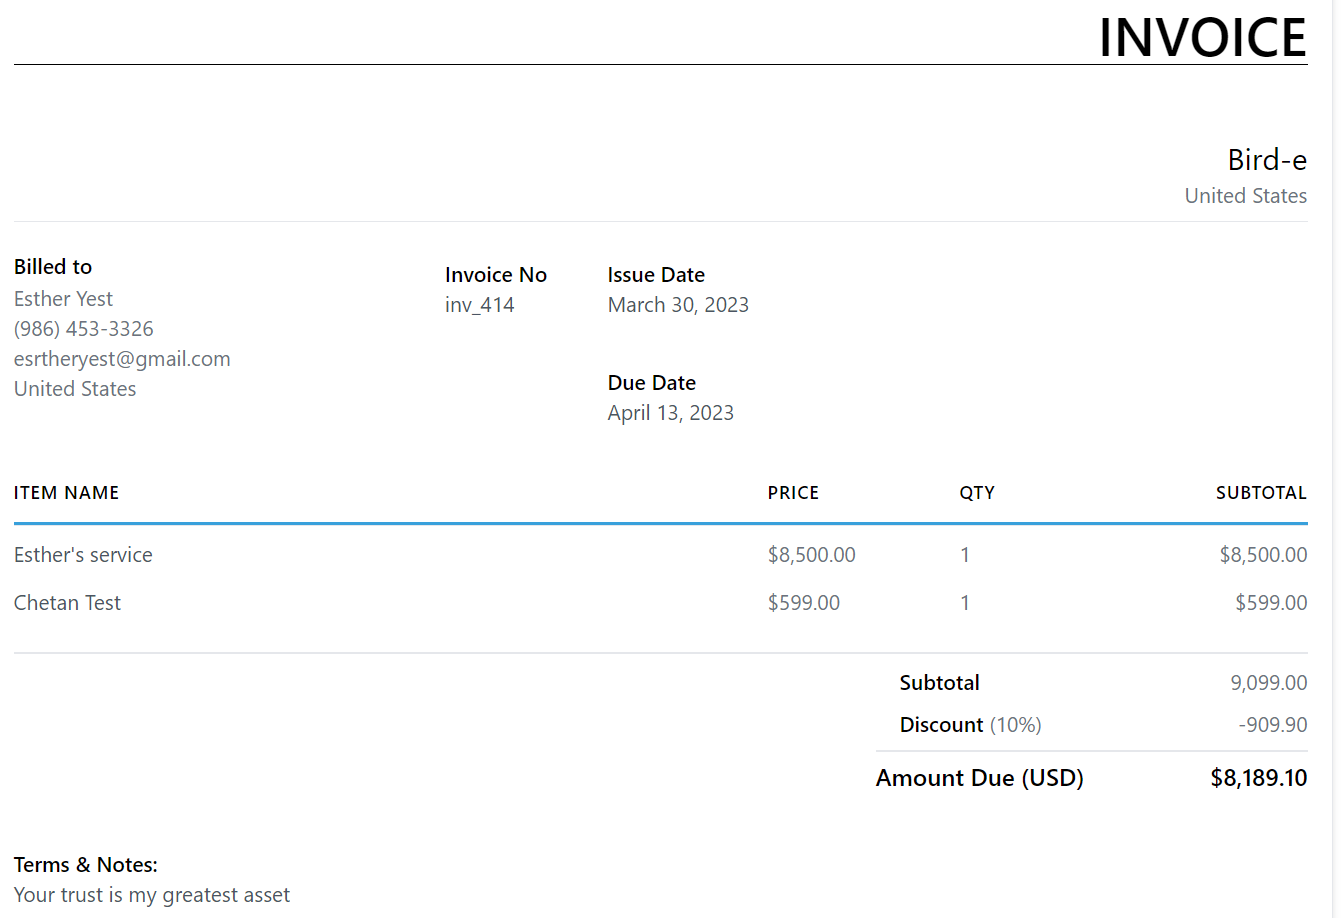
When you've made modifications to an invoice and wish to preview it before making further adjustments or sending it to your client, these options can provide a glimpse of how the invoice will appear in its current state. This enables you to ensure that the invoice meets your expectations and properly reflects the necessary information before sharing it with your client.
This is what the preview looks like below.
#### **Record Payment**
It's also a manual way of inputting payment. If you have created or sent the Invoice to the client and the client made the payment through a different medium such as Cash or Cheque then you can use this option to add the record into your system for you to know that the respective payment is already being received.You can also use this to record a payment while you are on the call with the client. All you have to do is create an invoice and select the payment method to record the payment right on the call.
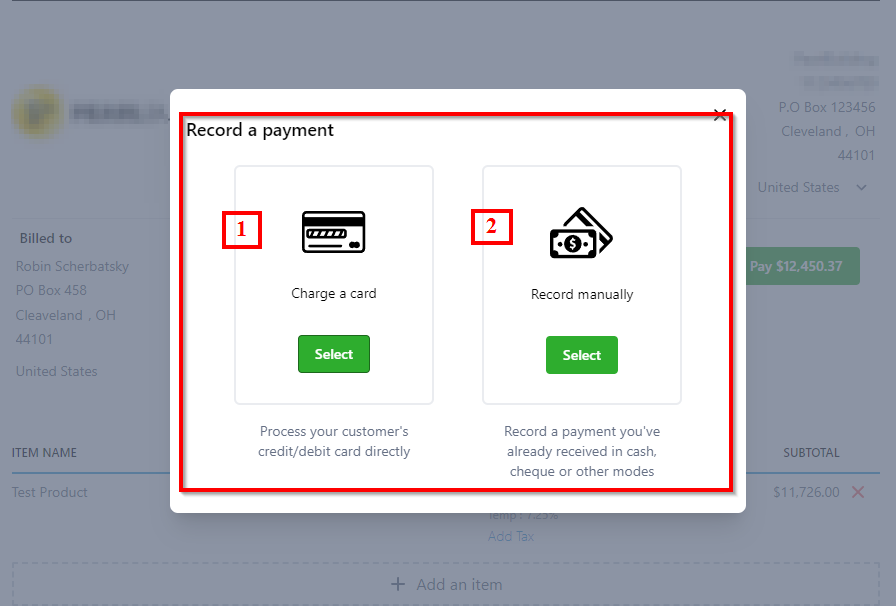
### **Record Payment Options**
1. **Charge a Card -** This allows you to record payments made through a card.
2. **Record Manually -** Allows you to record the payment made via cash cheque or bank transfer.
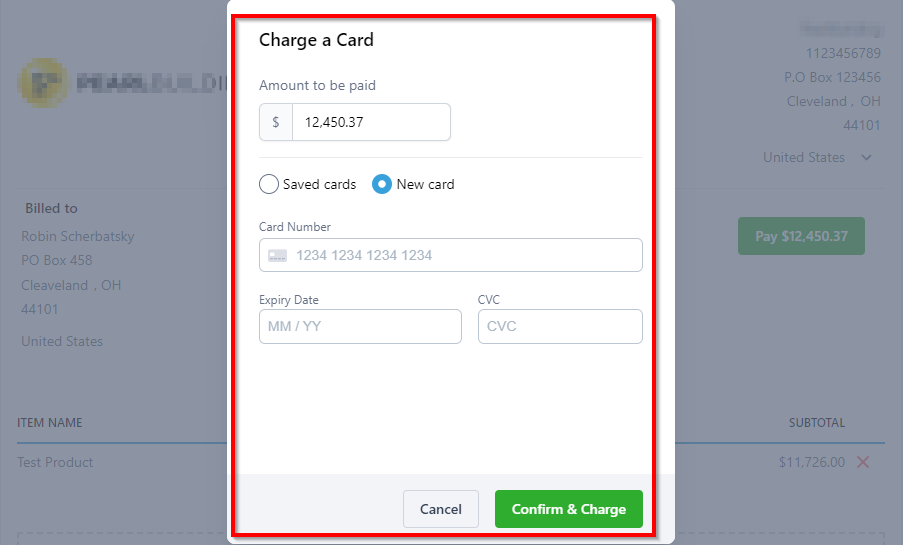
#### **Charge a Card**
**New Card** \
This option allows you to set up a new card for payment. When you're using the card for the first time, you would need to add it to the system before you can charge the card.
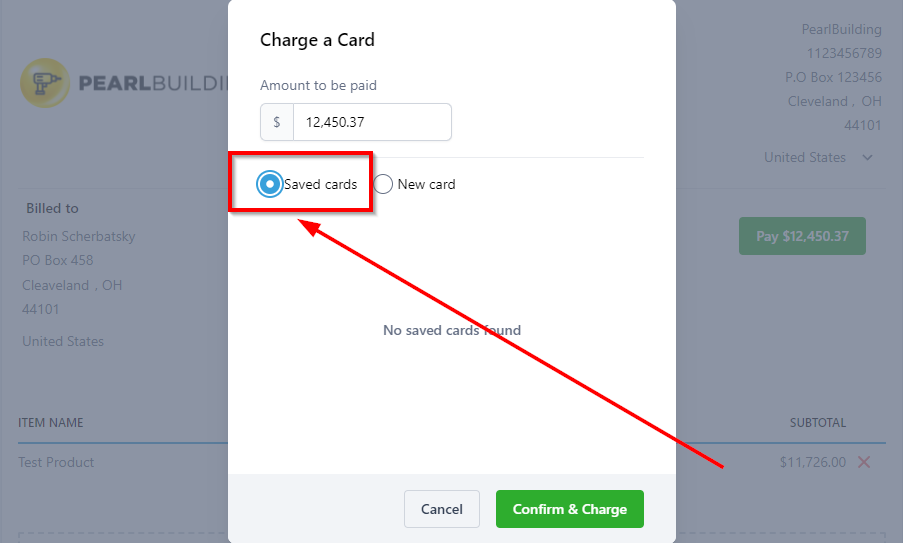
**Saved Cards**
Select this option when you already have saved a card in the system which you would like to charge for the payment. If you have more than one card saved in the system then you will be provided with the option to choose one of the cards from the list.
{% hint style="info" %}
Customers being charged will Not receive any automated email or text confirmation.
{% endhint %}
### Record Manually
To receive any payments done via credit/debit cards, you would need Stripe connected to your CRM. In case you don't have your stripe setup, you can use the "Record manually" option.
{% hint style="info" %}
**Please Note:** If you opt to use invoicing without Stripe Connect you will are required to manually record and collect payments.For now, recording manual payments without Stripe Connect works only for one-time invoices. Customers being charged will not receive any automated email/text confirmation.
{% endhint %}
There are various methods to receive payment with this option:
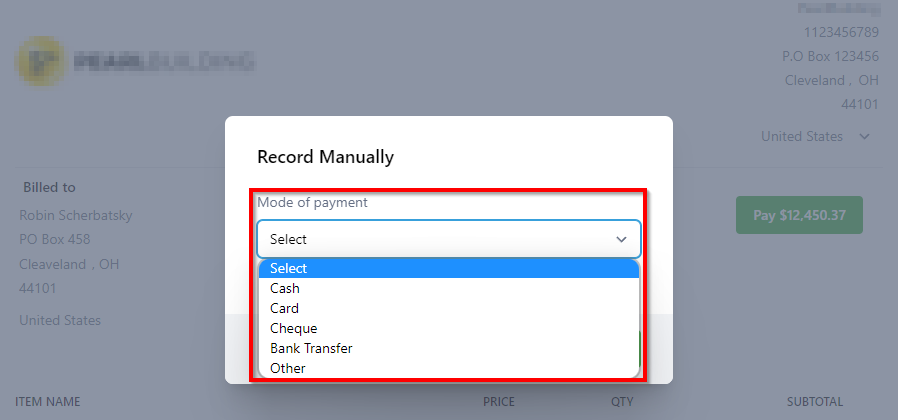
**Mode of Payment**
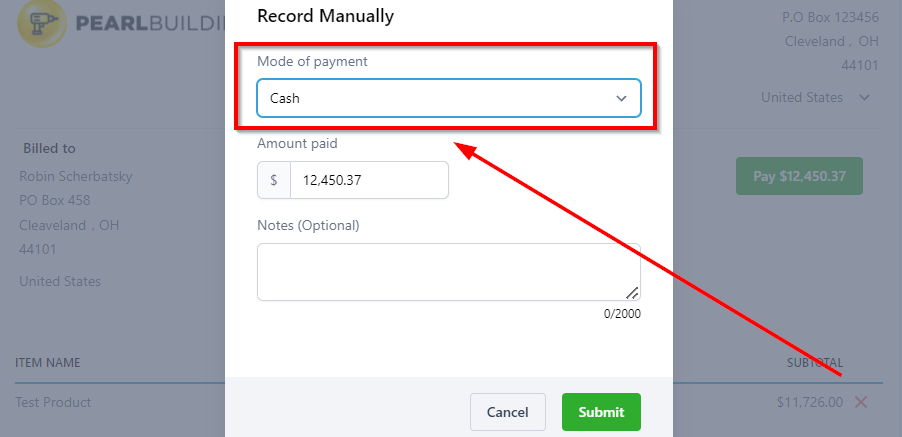
1. **Cash Payment** Select this option for cash payments and type in the exact amount in the space provided for it. You can also add notes for your records.
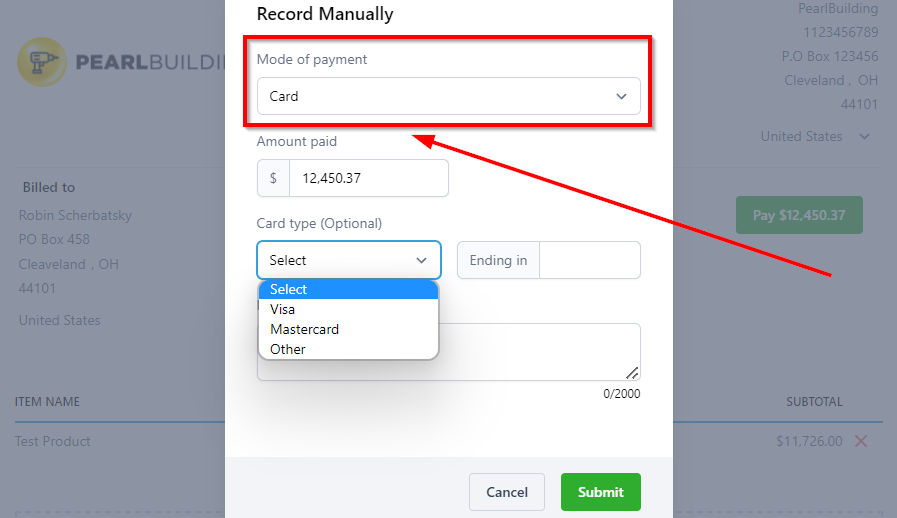
2. **Card Payment** This lets you take the payment through a card by selecting the type of card (Visa/Master), and the last 4 digits of the card (in case you have already saved the card in the system). Type in the exact amount in the space provided for it. You can also add notes for your records. However, to receive any payments done via credit/debit cards, Stripe Connect is needed.
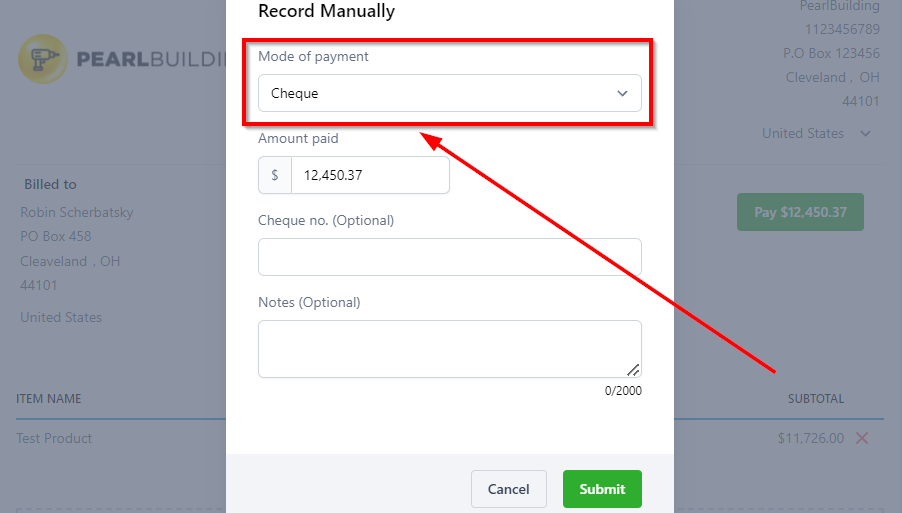
3. **Check Payment** Select the check option from the dropdown menu and enter the check number when your client has opted for check payment. Type in the exact amount in the space provided for it. You can also add notes for your records.
4. **More options (Manual Payment)** Apart from cash checks and cards, you can also go for bank transfers or another medium. Type in the exact amount in the space provided for it. You can also add notes for your records.
{% hint style="info" %}
If you opt to use invoicing without Stripe Connect you are required to manually record and collect payments.For now, recording manual payments without Stripe Connect works only for one-time invoices.
{% endhint %}
### Saving Invoice
The Saving Invoice feature allows you to save any changes made to an invoice, ensuring your modifications are securely stored.
### Sending an Invoice
Once the invoice is complete with the recipient's information and other necessary details, use the Sending an Invoice tab to deliver it to your contact.Invoices can be sent through email or text, and a test mode is available for verification purposes.
To switch between live and test modes, click on the advanced option.
#### Copy and Mark as Sent
The Copy and Mark as Sent tab is useful when you want to duplicate an existing invoice for future use, while also marking the original invoice as sent. This streamlined process enables you to perform both actions with a single click, saving time and effort.
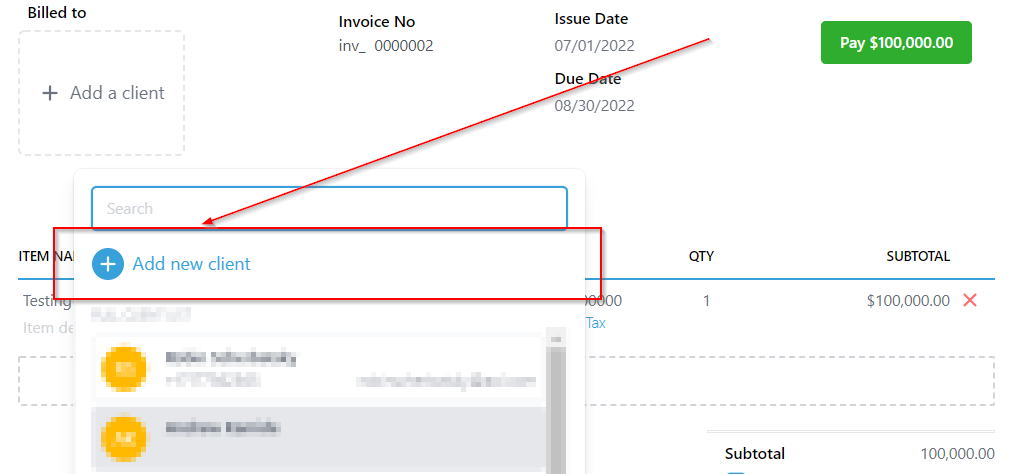
### Add New Client
The Add New Client feature is ideal for storing contact information in your CRM for ongoing use, streamlining the invoicing process.
**Creating New Contact**
To create a new contact, simply fill out the required information and save the changes. This ensures that your client's details are readily available whenever needed.
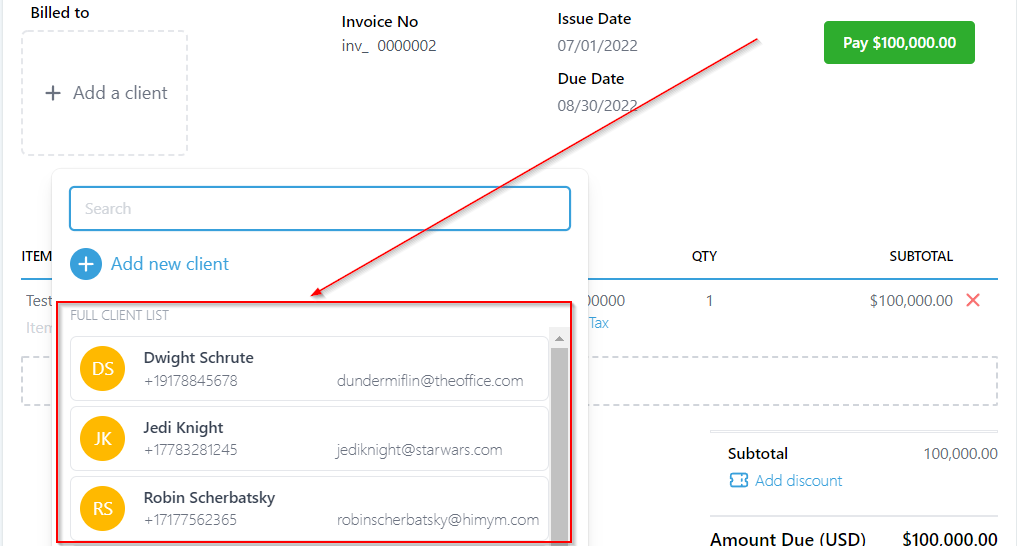
**Full Client List**
The Full Client List allows you to view and scroll through all existing CRM contacts, making it easy to select one for invoicing purposes.
**Removing Client**
If you've accidentally added incorrect contact information, the Removing Client option enables you to swiftly delete it and add the correct details.
**Editing Client Information Manually**
Additionally, the Editing Client Information Manually function permits you to modify your client's information as necessary. This is particularly helpful when adjustments are required for invoicing purposes, ensuring accurate and up-to-date records.
### Add Tax
The Add Tax feature enables you to include taxes for your products or services, providing clients with a clear breakdown of the total amount and taxes included in the final price. To learn about Tax settings, [click here](https://crmhelpcenter.gitbook.io/entrepreneur-club/payments/tax-settings).
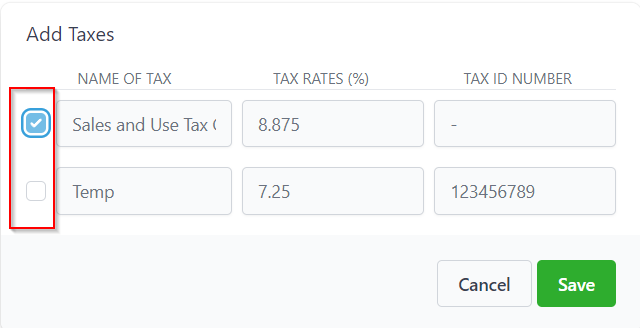
**Selecting the tax**
To select a tax, simply consult the table displaying the taxes created within your CRM system and check the appropriate box to add the chosen tax to your invoice.
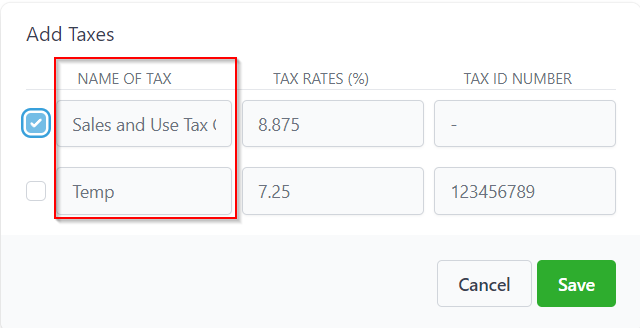
**Name of Tax**
Here you will see the name you have given to the individual tax.
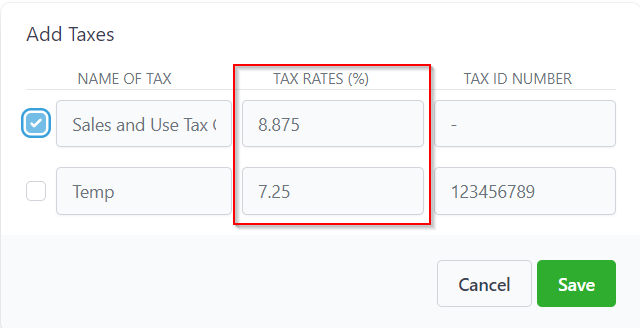
**Tax Rates**
Here you will see how much tax is applicable for each tax in the list.
**Tax ID Number**
This will show the Tax ID number you have created for each type of tax in the list.
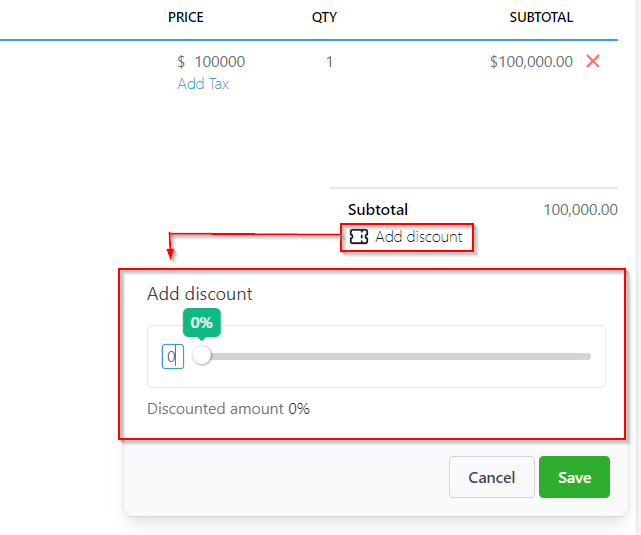
### Add Discount
The Add Discount feature allows you to apply discounts to your invoices, ensuring that any special offers or promotions are accurately reflected in the final total.
**Setting Discount Rate**
To set the discount rate, simply enter the desired percentage or numerical value, as demonstrated in the accompanying image. This ensures that your clients receive the appropriate savings on their invoices, fostering positive customer relationships and promoting business growth.

.png?alt=media&token=00b42875-d836-4bb1-bfb3-f93d568bb89b)

.png?alt=media)


.png?alt=media)